- Published 11 Jan 2023
- Last Modified 29 Aug 2023
- 10 min
A Complete Masking Tape Buying Guide
Our masking tape guide advises on the best tape and how best to use masking tape when painting or spray painting.

What is Masking Tape?
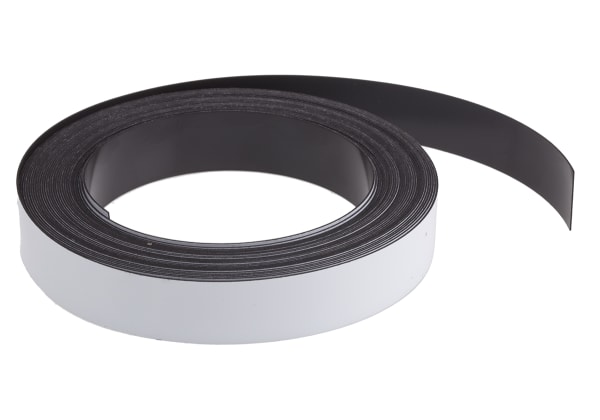
Masking tape is a common type of tape used for varying applications. Also known as painter’s tape, it is comprised of a pressure-sensitive adhesive and an easy-to-tear backing material, typically a thin paper.
Masking tape is available in a variety of different types, including multiple widths and colours, to suit a wide range of uses and applications. However, it is primarily used when painting to create straight lines and protect areas which should not be painted. It is a popular product among hobbyists and professionals alike.

When was Masking Tape Invented?
Masking tape has been around for longer than you might think! Adhesive tape first appeared in 1845, but masking tape was invented in 1925 by an American named Richard Drew who realised the need for a gentle painter’s tape.
Drew was an employee of 3M at the time and 3M masking tape is still a market-leading brand today, nearly 100 years on from his revolutionary invention.
Types of Masking Tape
Masking tape can be categorised in several ways, resulting in multiple different types of tape suitable for a range of applications and environments. It is important to understand the key differences between each type in order to choose the best tape for the task at hand.
One of the primary ways to categorise tape types is by the thin layer of adhesive material used in their manufacture. Three main types are used – acrylic, silicone, and rubber or rubber resin. Each of these types is explained in further detail in the sections below.

Rubber-Based Masking Tape
Rubber-based masking tape is widely used in a variety of general-purpose applications.
This type is reliable and features strong sticking properties, making it a firm favourite. However, rubber-based adhesive has a lower level of temperature resistance when compared to alternatives.

Acrylic-Based Masking Tape
Acrylic-based masking tape is suitable for use in extreme temperatures and more challenging environments.
Versatile and adaptable, acrylic-based adhesive can perform under fluctuating temperatures ranging from sub-freezing up to approximately 150° Celsius.

Silicone-Based Masking Tape
Silicone-based masking tape is also ideal for use in extreme temperatures. This type offers the best level of temperature resistance.
Provided that the backing material is not crepe paper or a similar flammable variant, silicone adhesive can withstand temperatures up to as high as 260°C.
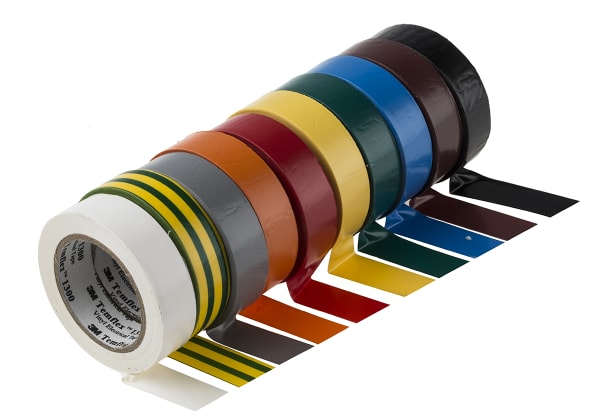
Masking Tape Colours
Masking tape is available in almost any colour you could want, ranging from the everyday whites and tans through to brighter colours intended for more specialist applications. While the colour of tape you choose may not always be an important consideration, you should still ensure that you are aware of the colour code and what each colour signifies.
Some of the most common colours you may encounter are explored below.

White Masking Tape
White is the most popular colour for masking tape. Discreet and ideal for a wide variety of everyday applications, white masking tape is regularly used by decorators and professionals as well as hobbyists and DIY enthusiasts alike.
Sometimes called household masking tape, white tape is versatile and well suited to a range of applications.

Blue Masking Tape
Blue tape is popular in the US as it is the colour of most types of painter’s tape (sometimes purple painter’s tape is also used in the US as an alternative).
However, with painter’s tape, the material and quality of the tape are arguably more important than the colour when it comes to performance and the finished result.

Yellow Masking Tape
Yellow masking tape is also used by painters and it is often the preferred colour choice for use in the automotive industry.
Due to its bright colour, yellow tape is highly visible even in low light, meaning that it stands out against the background and provides easy guidelines for painting.
How to Use Masking Tape
Masking tape can be used in a variety of scenarios, and each will likely require a slightly different use for this versatile product. One of the principal uses is when painting – you can read more about this in the sections below.
However, before you add masking tape to a surface, there are a few additional steps you need to take first.
- Move any furniture or large items away to enable you easy access to the space
- Take down any removable items, including picture frames and décor, screens, curtains and blinds. If possible, you may also want to safely unscrew any electrical sockets
- Thoroughly clean the surface and allow it to dry
How to Apply Masking Tape in a Straight Line
Applying masking tape in a straight line is relatively straightforward, but care should still be taken to ensure proper application and a clean finish. Begin by sticking the tape in one corner – don’t be tempted to start midway along a wall as this will make achieving a straight line more difficult. Instead, start in a corner and work outwards, unravelling the tape from the roll as you progress and ensuring each section is securely stuck down before moving on. If you need an exact straight line or a highly precise finish, you may find it beneficial to use a ruler, tape measure, or similar straight-edged measuring tool to help you line the tape up correctly.
How to Remove Masking Tape
Once your task is complete, you will need to remove it. If you have been using masking tape for painting, never remove the tape until the paint is completely dry. Otherwise, this could remove the fresh paint with the tape, smudge or blur the lines, or even result in the presence of paint drips. For highly adhesive tape types, using a knife may make it easier to lift the edge and guarantee a hassle-free tape removal.
What is the Best Masking Tape to Use?
The best type of masking tape will depend on several key factors, as well as your intended use for it. Some tapes are best suited to particular applications or environments, while others are designed to provide clean lines for painting, or adhesion to specific surfaces.
Some of the key considerations you should keep in mind include:

Size
When it comes to tape, size is less about the length of tape on the roll (larger projects will simply require multiple rolls of tape) and more about the width and thickness of the tape. Both are typically measured in millimetres (mm). Narrower widths of tape will make masking small areas, corners, and tight spaces much easier. On the other hand, wider tapes are best suited to covering larger areas and providing additional levels of protection against paint drips or splashes, for example.

Adhesion
How sticky is masking tape? While this will be largely dependent on the quality of the tape and the material used, different types boast varying levels of stickiness. This is beneficial as it allows you to opt for less-sticky tape when working with a delicate surface or newly painted materials. Conversely, higher levels of adhesive will likely be needed when applying tape on textured surfaces or in extreme temperatures.
Masking Tape for Painting
This is one of the most common uses, if not the most popular use. While applying tape to surfaces before decorating may seem like a simple task, it is important to utilise the correct techniques. Care should always be taken to avoid any gaps, lines that aren’t straight, or improperly stuck-down tape, as these common errors could lead to issues further down the line.
What is the Difference Between Masking Tape and Painter’s Tape?
In the simplest terms, masking tape and painter’s tape are the same product. However, there are important similarities between the two which makes selecting the right type all the more important. Getting into the specifics, painter’s tape is a sub-type of masking tape.
As a general rule, traditional masking tape is usually less sticky than specialist painter’s tape. By contrast, painter’s tape (often blue tape) is typically used for more specialist applications and for creating high-quality, clean paint lines. It is designed to prevent paint bleed and peel away with ease, whereas masking tape is a much more general-purpose product.
How to Tape a Room Before Painting
The simplest approach to take when preparing a room for painting is that the masking tape should act as a border between the area you want to paint and the rest of the room. In simple terms, once the room has been fully masked, everything within the borders created by the tape needs to be painted.
This includes taping off the top and bottom of the walls (where the wall meets the ceiling and the floor or skirting board, to prevent drips), taping around the door and windows, as well as any non-removable fixtures and fittings like light switches, plug sockets, lights etc. If you are painting a feature wall, make sure to mask it off from the rest of the room too, to provide straight lines between different colours.
How to Use Masking Tape for Spray Painting

Similar to its uses for standard decorating applications, masking tape can also be used when spray painting. Always make sure to fully mask the whole area to be spray painted before you start to use the paint, as this will negate the need to stop and start multiple times throughout the process.
The amount of masking you need to do will depend on the type of paint and spray paint gun or machine you will be using. As a general rule, more precise machines intended for spray painting smaller areas will require less tape than what will be needed with larger areas. Another factor to take into consideration is your personal level of proficiency with spray paint. Professionals will have more expertise, meaning that less tape will be necessary, whereas those new to spray painting may want to mask more areas to safeguard against any potential overspray.
FAQs
Is Masking Tape Waterproof?
Whether or not masking tape is waterproof all depends on the particular type of tape. Some types are much more robust than others, intended for exterior use, while others do not have waterproof properties. The majority of types are water-resistant rather than fully waterproof, and painter’s tape is typically water-repellent to help ensure clean and crisp lines. Always make sure to double-check the manufacturer’s guidelines if in doubt.
How Strong is Masking Tape?
Masking tape is designed to be lightweight and easy to remove, so most types are not particularly strong. The tape’s strength will depend primarily on its thickness and backing material, and similarly, the strength of the adhesive will be dependent on the type of material used. If you need a stronger solution, duct tape or packaging tape may be a suitable alternative, depending on the project in question.
Does Masking Tape Leave Residue?
Depending on the quality, residue may be left behind once the tape has been removed. You can minimise the chances of this by:
- Using painter’s tape instead of standard masking tape
- Avoiding leaving masking tape on a surface for longer than the recommended time
- Not using tape in high temperatures unless it is specifically designed for these environments
- Ensuring the surface is thoroughly cleaned before tape application
- Removing tape by peeling in a single, clean strip
How Do You Remove Masking Tape Residue?
The following tips should help you to remove any traces of stubborn adhesive:
- Apply a quick burst of heat to melt it, using a heat gun, for example
- Use warm water to soften it
- Depending on the surface, gently scrape the residue with a putty knife
- Apply a thin layer of cooking oil or dish soap, then scrub gently
How Do You Remove Masking Tape from a Wall Without Peeling Paint?
Masking tape should be removed as soon as possible – but only once the paint is completely dry. Quick and clean removal will help to minimise the chances of residue being left behind and should also ensure the tape itself is easier to remove. If you cannot peel an edge of the tape, use a knife to lift an edge – ideally in a corner &nndash; which you can then use to pull the tape away, leaving a nice clean edge. If you do use a knife, make sure to exercise care to avoid scratching the new paintwork.
When Should Masking Tape Be Removed After Painting?
Masking tape should only be removed once the paint is dry, to avoid any blurring of the paint edges or accidental removal of the paint itself. Ideally, the best time to remove it is when the paint is touch-dry. Never remove it if the paint is either wet or tacky, as this is highly likely to cause further issues. Another important factor to consider is that different types of masking tape are only designed to stick to surfaces for a certain length of time. Some may stick for as little as three days, while other types will retain their qualities for much longer.
How Do I Keep Paint from Bleeding Under Masking Tape?
The best way to prevent bleeding is to use specialist painter’s tape as opposed to multi-purpose masking tape. This tape is designed specifically for painting and boasts water-repellent properties to assist with keeping lines straight and paint bleeds at bay. Another tactic is to limit the amount of paint you are applying near masking tape. Avoid overloading the area with paint, as this will not only heighten the possibility of paint bleed occurring, but it is also likely to result in drips and the likelihood of an uneven or patchy coat.