- Published 12 Jan 2023
- Last Modified 4 Sept 2023
- 12 min
A Guide to Circlip Pliers
Use our handy guide to discover more about circlip pliers, including their uses and the different types available.

Throughout this guide, we will explore all the key information you need in order to shop for circlip pliers online. Our ultimate aim is to help you identify the various sorts of snap ring tools or C-clip plier sets available. This should help you to decide which is best suited to your general day-to-day requirements and applications.
Circlip pliers are sometimes referred to as retaining ring pliers, snap ring pliers or C-clip pliers. They’re designed for installing or removing circlips, a type of fastener that works like a retaining ring.
Circlips are generally deployed where components are required to be kept fitted on shafts or housings, as well as with a range of bearings used in mechanisms designed to twist, spin, turn, rotate, or pivot. The key selling point of C-clips is that they allow for the easy rotation of shafts and dowel pins when installed. They also prevent lateral (sideways) movement as a result of their unique design and shape, which acts as a self-locking mechanism once installed around a suitable part.
Circlips themselves tend to have open ends, rather than being a complete ring. This open-ended ‘horseshoe’ design gives them a certain amount of spring tension. Once fitted in place, the spring pressure effect ensures that they don’t move or slip out of place.
The majority of circlips feature a small hole in a lug at either end, which allows for the installation or removal of the circlip plier tips. Circlip pliers, or circlip removers, are therefore an essential piece of kit for anyone who works regularly with this type of fastener.

Circlip Spotlight
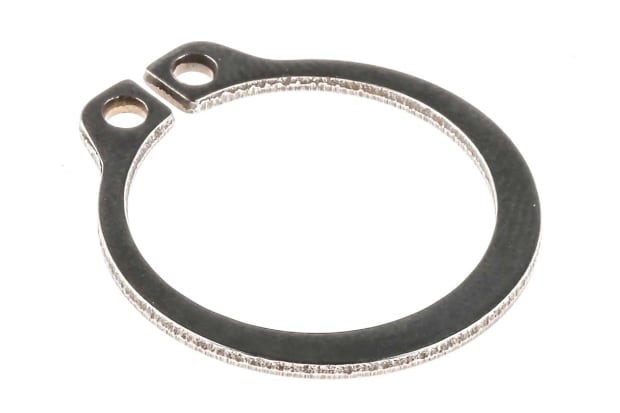
Circlips are small, semi-flexible metal rings. They are a type of fastener and are also known as C-clips, Seeger rings, snap rings or Jesus clips.
They’re most commonly used in machine grooves, where their key job is to hold dowel pins securely in place. In this role, they provide an efficient way to keep mechanical parts together.
C-clips are simple components, and their ease of use is just one of the reasons why they are now so widely deployed across many of today's cutting-edge assembly, production line and engineering industries. They’re extremely common in almost all workplace environments relating to automotive or engine assembly and repair, heavy machinery, transformers, turbines, pistons, and so on.
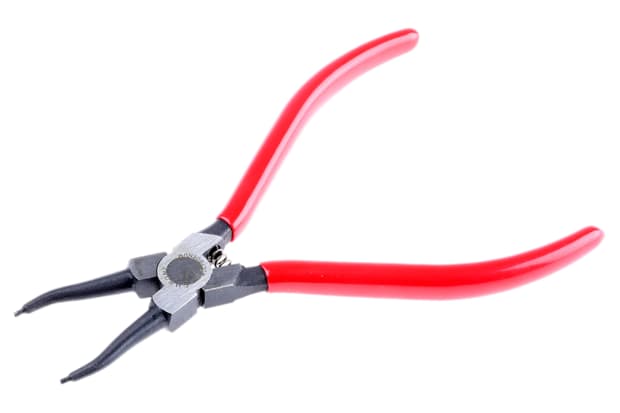
What are Circlip Pliers?
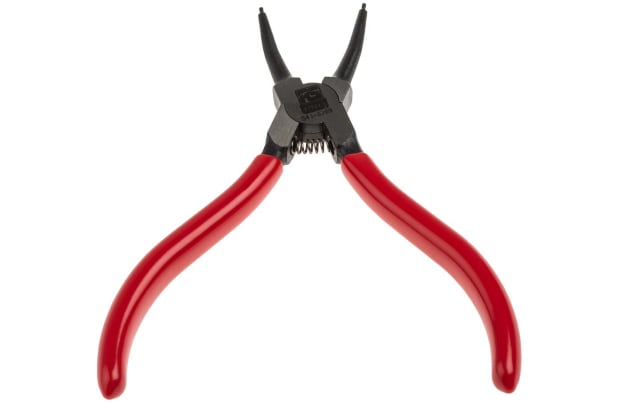
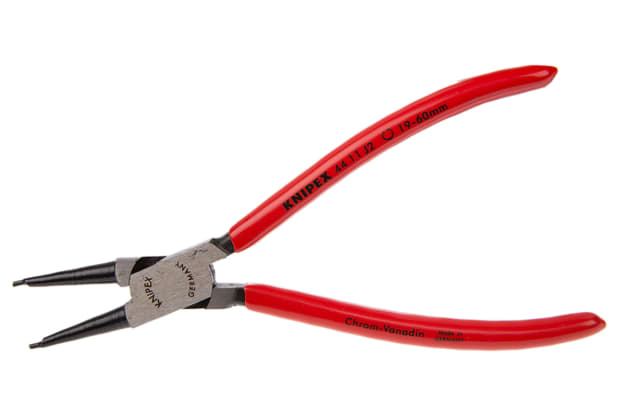
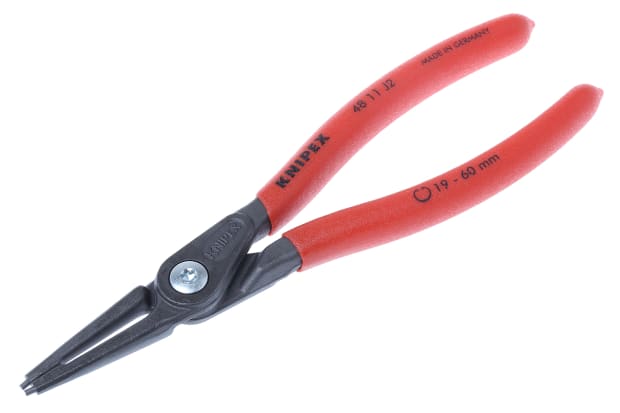
Circlip pliers are a particular type of hand tool designed for installing and removing C-clips. As you can see from the image, the main difference between retaining ring pliers and normal pliers is that circlip pliers feature a tip specially designed for working with circlips.
Standard plier models generally have flattened or sharpened tips, depending on the particular applications they are intended to be used in. Circlip pliers, on the other hand, have tips shaped precisely to fit between the grip holes of circlips. This makes it far easier to manipulate and manoeuvre them into place.
Individual pairs of snap ring pliers are usually made to work only with circlips of certain specific diameters. Although C-clips can come in a fairly wide range of sizes, they’re most often sold around a more limited range of ‘standard’ gauges. These tend to be found in far more widespread use than other, non-standard varieties and sizes.
However, it’s still important to choose the right pair of C-clip pliers for the type and size of the snap ring you’ll be using. In the sections below, we’ll examine some of the different types of circlip pliers on sale and help you to identify how and when each kind is supposed to be used.
Types of Circlip Pliers
Depending on the supplier, you’ll often find several different types of circlip pliers for sale. While they’re all made specifically for use with C-clips, the various designs on offer do have some subtly different intended uses.
One key distinction to be aware of is the difference between pliers designed for working with internal circlips and those designed for use on external circlips. As outlined above, internal and external circlips are subtly different types of fastener. Each requires a slightly different tool in order to be manipulated successfully. The tools for working with each type will usually be labelled along the lines of ‘circlip pliers internal’ or ‘circlip pliers external’, making it easy to distinguish between the two.
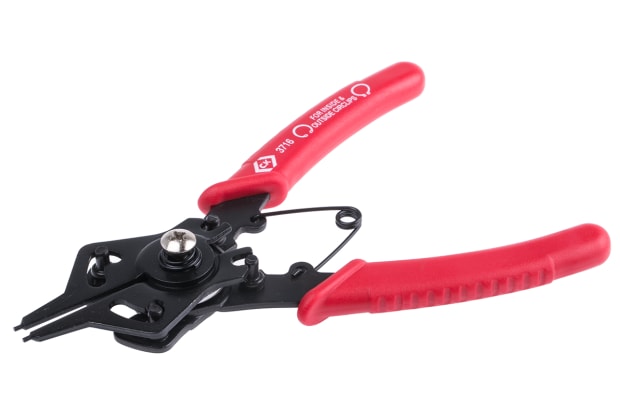
It’s also important to note that certain C-clip plier types have the ability to switch between snap rings that function in both directions. These handy models are commonly referred to as convertible or reversible circlip pliers.
External Circlip Pliers
External circlips are made to fit around the outside of a shaft or dowel, usually seated in a groove. Once in place, they exert their spring pressure inwards towards the dowel as a means of providing grip. External C-clips, therefore, need to be opened up for installation, using external circlip pliers. This allows the ring to expand slightly and fit more easily over the dowel.
With the tips of the external circlip pliers inserted into the holes in the C-clip, squeezing the handles results in the tips of the external circlip pliers opening up. This stretches the snap ring out slightly, allowing it to be slotted over a shaft.
Internal Circlip Pliers
Internal circlips are designed to be fitted inside a hollow, cylindrical housing or bore. The spring action pushes outward against the sides, so it’s a radiating pressure that holds the ring in place.
Internal circlip pliers work the opposite way around to external versions. When the tips of internal circlip pliers are inserted into the holes on the snap ring, squeezing the handle results in the plier tips closing together. Once the C-clip is in position, the handles can be released, and the ring returns to its maximum diameter.
Long Nose Circlip Pliers
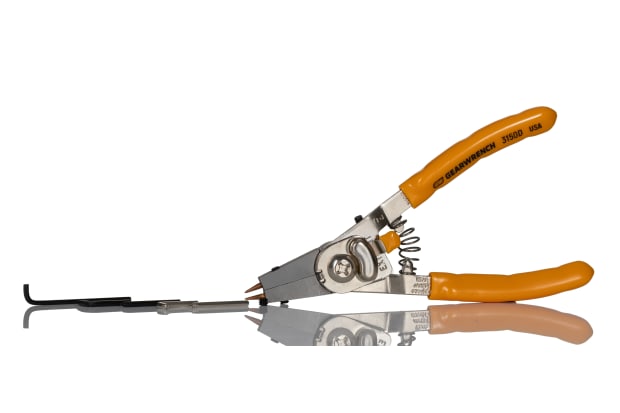
Long nose circlip pliers are a specialist tool designed for use with longer dowels or bores. They’re also handy for inserting and removing C-clips in harder-to-reach places.
These pliers feature noticeably extended tips for easier operation. Long nose internal circlip pliers tend to be more widely sold than external versions. This is because it’s generally more challenging to insert a snap ring inside a deep bore than around the outside of one.
You can buy long nose circlip pliers that come with either straight or bent tips. The best choice will depend on the types of installations or access conditions you will be working with most often.
Heavy-Duty Circlip Pliers
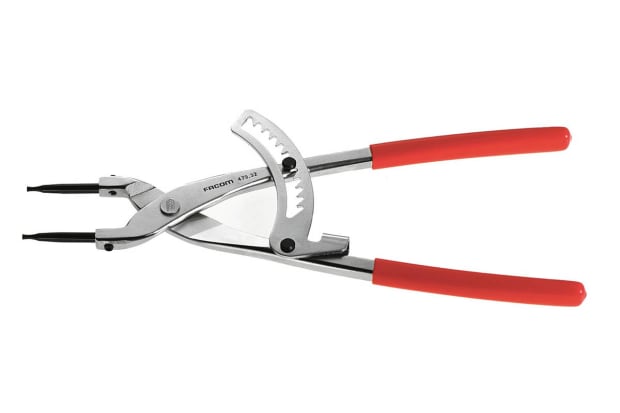
Heavy-duty circlip pliers are built for use in more demanding situations, typically when needing to manipulate, install or remove much bigger or thicker retaining rings.
Industrial or heavy-duty snap ring pliers tend to be used for larger machinery assembly and repairs. They’re usually manufactured to a high grade from toughened materials, such as heat-treated steel, and may have galvanised tips for increased hardness.
Heavy-duty C-clip pliers are also more likely to feature additional safety mechanisms and benefits. A common example might be a ratchet locking mechanism, to enable greater control and secure grip against higher-gauge snap ring tensions.
Circlip Plier Sizes
You should note that a circlip’s diameter will generally refer to the width of the shaft, dowel or bore it’s designed to encircle or slot into. The stated size of a given snap ring refers to a measurement stretching from the outer edge on one side to the inner edge on the opposite side.
Because there’s a fairly broad range of different C-clip sizes in common use, you’ll generally find a similarly wide choice of retaining ring pliers. Each pair is designed specifically for use with particular sizes of snap ring, so it’s important to know exactly what gauges of C-clips you’ll be working with before you buy. Alternatively, you can opt to purchase a full circlip plier set for greater flexibility in the future.
Large Circlip Pliers
The term large circlip pliers generally refers to tools designed for use with C-clips up to a diameter of around 500mm, or 20”. However, you can also find more specialised models which will handle much larger retaining rings. Some tools can accommodate C-clips of up to 1000mm (40”) diameter or more.
Large circlip pliers can have either straight or bent tips, making certain jobs and access points easier to reach.
Small Circlip Pliers
On the other hand, some tasks may require very small circlip pliers, sometimes labelled as miniature circlip pliers. These can typically be used down to C-clip diameters as low as 0.5mm, or 0.02”.
Again, for highly specialised tasks, some manufacturers offer even more precision tools than this. These tend to be less widely available, although as with larger models, both straight and bent tips are available.
Circlip Plier Sets
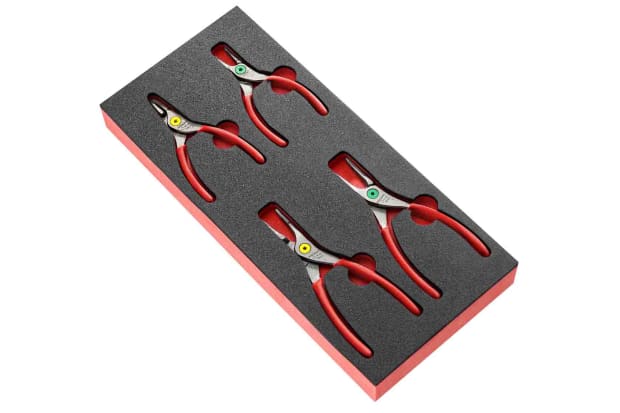
Many professionals regularly work with a variety of different retaining ring sizes. In this case, it’s often cheaper and more convenient to buy a full circlip plier set, rather than multiple single versions.
Depending on the range of tools included, these may be sold as a heavy-duty circlip plier set, large circlip plier set, or similar. Either way, you’ll want to make sure that any multi-tool package you do buy includes all the main sizes you’re likely to need in your typical day-to-day applications.
The best circlip plier sets will always cover the vast majority of standard snap ring gauges. They’ll typically be sold in some sort of carrying case, pouch or organising tray, making it easier to store and identify them quickly and safely.
How to Use Circlip Pliers
When it comes to knowing how to use circlip pliers, the key is first to make sure that you’re using the correct ones for the task at hand.
First and foremost, selecting the best circlip pliers for a given job means knowing exactly what size of retaining ring you’re working with. Secondly, you’ll need to identify what type of C-clip installation or removal you’re performing - internal or external.
Installing and Removing Internal Snap Rings
- Insert the circlip plier tips into the lug holes of the C-clip
- Squeeze the handles, bringing the plier tips together; this will reduce the diameter of the retaining ring
- Ensure you’re only exerting enough pressure on the retaining ring to insert it into the required position (too much force can damage or break it)
- Holding the pliers firm and steady, slot the circlip into the groove inside the shaft or bore where it’s going to sit
- Release the pliers only when the C-clip is fully seated
- To remove an internal retaining ring, simply reverse the order of the steps above
Installing and Removing External Snap Rings
- Insert the circlip plier tips into the lug holes of the C-clip
- Squeeze the handles, forcing the plier tips apart - this will increase the diameter of the retaining ring
- Once again, ensure you’re only exerting enough pressure on the retaining ring to slip it into the required position around the outside of the shaft or dowel (too much force can damage or break it)
- Maintain a firm and even grip on the plier handles, and make sure the circlip is fully seated in the groove before releasing - it should click into place when correctly positioned
- Release the pliers only when the C-clip is fully seated
- To remove an external retaining ring, simply reverse the order of the steps above
Circlip Plier Tips
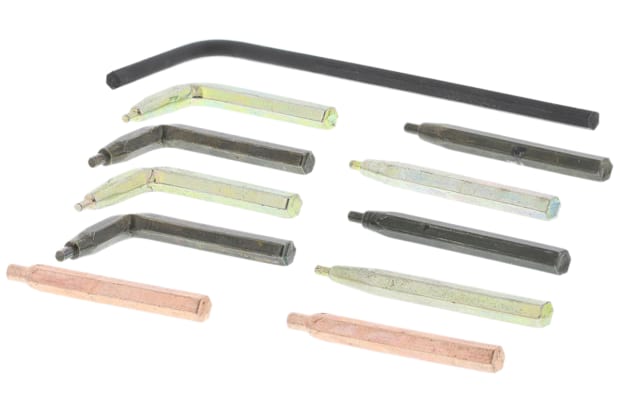
Many models of C-clip pliers are designed to accept a variety of different interchangeable circlip plier tips. This gives you far more flexibility in terms of tackling a wider range of jobs, allowing you to work with varying sizes of circlip using just one tool.
It also means that you can buy snap ring plier replacement tips if an older pair starts to show signs of wear or damage. This is much more cost-effective than having to buy an entirely new tool.
In most cases, interchangeable circlip plier heads are held in place by a fastening screw, located at the point where the handles and the head join together. There will likely also be some form of pin and spring mechanism, which helps to release and secure the removable heads from the body of the pliers.
Both the spring/bar assembly and the retaining screw must be open in order to swap to a different head or set of tips. Of course, it’s important to ensure you’ve properly locked and tightened everything up again afterwards.
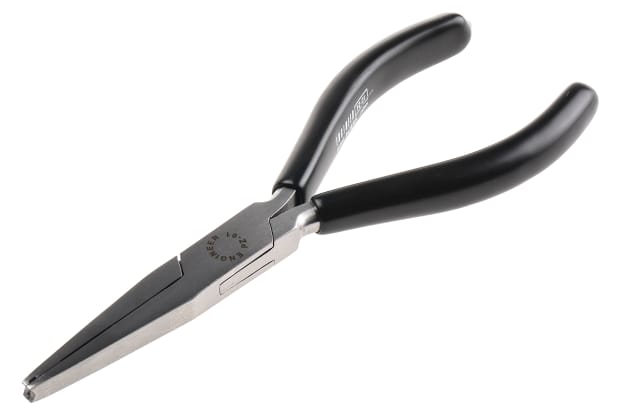
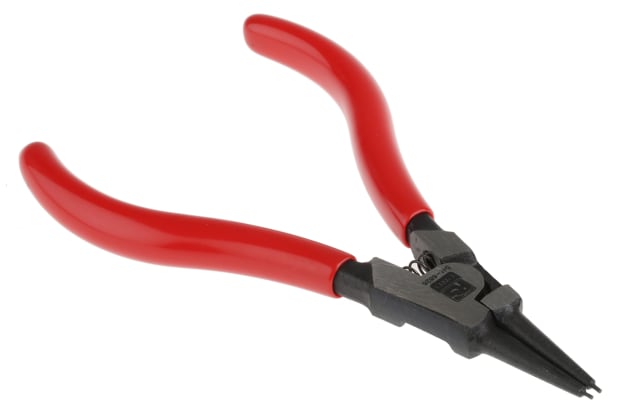
Straight Circlip Plier Tips
Straight circlip pliers are handy for most sorts of standard retaining ring installation and removal jobs, especially when working with internal C-clips in narrow spaces. Straight circlip pliers are among the easiest types to use for beginners. They offer a good balance between control, grip, accuracy, and general accessibility.

Bent Circlip Plier Tips
Angled or bent circlip pliers can give you better access when working in space-restricted or harder-to-reach areas. You can buy circlip plier tips that are bent at a fairly diverse range of angles, but by far the most popular is 45 degrees and 90 degrees.
Because they’re curved at the tips, you don’t need to have a straight-on approach to the C-clip install or removal location. Instead, you can come at it from slightly above, below, or off to one side, making the task easier and more accessible.
Popular Brands
RS Pro
Explore the extensive range of circlip pliers available from RS Pro, our in-house brand, and choose the most suitable tool for your requirement
Knipex
Knipex offers a wide range of top-quality circlip pliers, with tools available to suit a variety of applications. Browse online today.
Facom
Browse the full range of circlip pliers from leading brand Facom, including tools in a variety of sizes and styles to suit your needs.
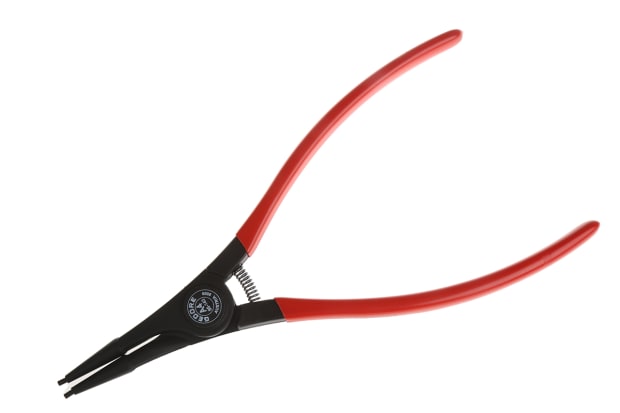
Gedore
Gedore circlip pliers are suitable for a wide range of applications. View the full range online now and shop today.